Install Google Play Store on Windows 11 (Updated December 2022)
Requirements to Install Google Play Store on Windows 11
- First, you need to enable virtualization on your Windows 11 PC. For that, boot into the BIOS and look for “Virtualization Technology” and enable it. On some computers, it’s also called “Intel VT-x” or “AMD-V” or “SVM Mode”.
- Next, uninstall Windows Subsystem for Android from your PC if you have already installed it from the Microsoft Store.
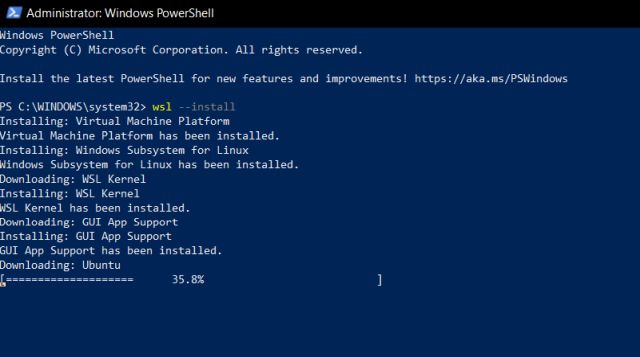
- Next, you need to set up WSL 2 (Windows Subsystem for Linux) on your Windows 11 PC, which you can do by following our guide. You can install Ubuntu, Debian, or OpenSUSE based on your preference. WSL 2 is required as it enables us to locally generate the modified Windows Subsystem for Android image.
Generate Windows Subsystem for Android Image With Play Store Support
- First, open Ubuntu (or whatever distro you have installed) with Admin permissions on Windows 11. Open the Start menu and search “Ubuntu”. Now, click on “Run as Administrator” in the right pane.
- After that, open the MagiskOnWSALocal GitHub page linked here and click on Code. Here, copy the URL under “Local” and “HTTPS”.
- Move back to the Ubuntu Terminal and run the below command. Paste the URL you copied above after git clone. This will clone the repository to your computer.
- Next, run the below commands one by one to move to the scripts directory.
- After that, run the script by executing the below command. This will download the required dependencies and start the command-line installer. This process will take anywhere between 5 to 10 minutes based on your internet speed.
- Next, a command-line installer will open up. Here, choose “x64” as it’s the most common desktop architecture out there. By the way, to select an option, press the “Space” key on the keyboard, and press “Enter” to confirm the selected option.
- After that, choose “retail” as it’s meant for the stable channel. This will give you the best experience, but if you want to try the latest WSA build, you can opt for the Dev channel.
- Under the Magisk version, I will suggest sticking with the “Stable” release.
- On the next page, you will be asked whether you want to install GApps. This is extremely important. Choose “Yes” as you want to install Google Play Store on Windows 11.
- Here, you can choose which GApps solution you want to use. I have selected “OpenGApps“.
- Next, you can select if you want to root WSA with Magisk or not. If you don’t want to do that, choose “none”.
- Now, select “No” when asked if you want to compress the output.
- Finally, it will start downloading the Windows Subsystem for Android image and apply all your preferences. This will take considerable time, somewhere between 10 to 15 minutes, so please keep patience.
- After it’s done generating the image, you will see something like this in the Terminal. Now, it’s time to move to the next step.
Manage Windows Subsystem for Android Files
- Open File Explorer and move to “Linux” in the left pane. Here, open the Linux distro (for me, it’s Ubuntu) you have installed.
- Now, navigate to home -> [Ubuntu username] folder -> MagiskOnWSALocal -> output. Here, you will find one more folder, which you need to open.
- Now, copy the contents of the “WSA with Magisk” folder.
- Now, open the C drive on your Windows 11 PC and create a folder named “WSA“.
- Paste all the copied content inside the “WSA” folder.
Install Google Play Store on Windows 11
- Finally, it’s time to install Google Play Store on Windows 11. But before that, press the Windows key and search for “developer” without quotes. Then, select “Developer settings” from the search results.
- Here, turn on the “Install apps from any source, including loose files” toggle under the Developer Mode section. On the next prompt, choose “Yes”.
- Now, open the Start menu and search for “powershell“. Next, click on “Run as Administrator” in the right pane.
- Then, run the below command in PowerShell to move to the WSA folder.
- Once you have moved inside the folder, run the below command. This will start installing the modified WSA image with Google Play Store support on Windows 11. This will take some time, so again keep patience.
- Once the process is done, go ahead and open the Start menu. You will find a “Play Store” icon right there. If it does not appear there, search for “play store”, and you will surely find it.
- Open the Play Store app on Windows 11, and it will work absolutely fine. Instead of your primary account, we suggest you sign in with a secondary Google account to be on the safer side.
Get Google Play Store on Your Windows 11 PC
So that is how you can install Google Play Services and other Google frameworks alongside WSA in Windows 11. It will not only allow you to officially download Android apps from the Google Play Store but also use apps dependent on Google Play Services for notifications and other services. Anyway, that is all from us. If you want to install the newly-released Microsoft PC Manager app on Windows 11, head to our linked guide. And to bypass Windows 11’s requirements during installation, we have a detailed tutorial in place for you. Finally, if you are facing any issues, let us know in the comment section below.
